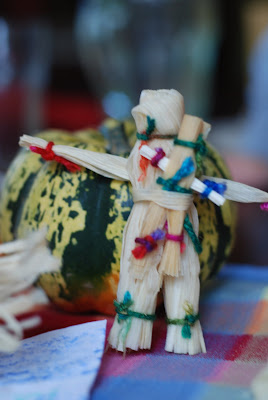
Mia had a really fun time at the local heritage festival. In particular, she got to make a lot of fun crafts and then teach them to friends and family. One of those fun crafts was making the corn husk dolls. These can be as simple or elaborate as one would like. Mia taught me, and then we decided to share it with others at the Michaelmas festival. Here is a basic tutorial for a very simple doll, easy for young hands to master with a little practice.
The supplies needed include scissors, corn husks, and yarn or embroidery floss. I purchased a bag of husks at our local Latino specialty market. First, you want to soak dry corn husks.I soaked the husks in a bowl of water for about 30 minutes.
Take several husks and fold them in half, together.
Then, roll the husks with the more pointed ends on the inside. You want to roll them lengthwise so the folded side looks like a spiral.
Then, tie around the top, which will make the head. It is important to roll tightly, and tie a tight knot. It helps to have extra fingers to hold the string tightly.
Next, you will want to peel the layers up to form a skirt.
Keep peeling up to the head, all around the doll.
Then, take a smaller piece of husk, roll it lengthwise and tie the ends to form the hands and arms.
Carefully slide the arm into the outer layers of the skirt, up toward the head.
Then, wrap a piece of yarn around and crosswise over the arms, like an "X". This will hold the arms in place. At this point, as an alternative, the legs can be ties to each side to form pant legs.
And, voila! You have a lovely little friend to play with. Does she need some company? How about making a whole family! Perhaps you will want to add some yarn hair or acorn caps for the little ones? The possibilities are endless. Happy Autumn!


 three cheers for first place in the snake race!
 jasper's lovely "work" during mia's main lesson block